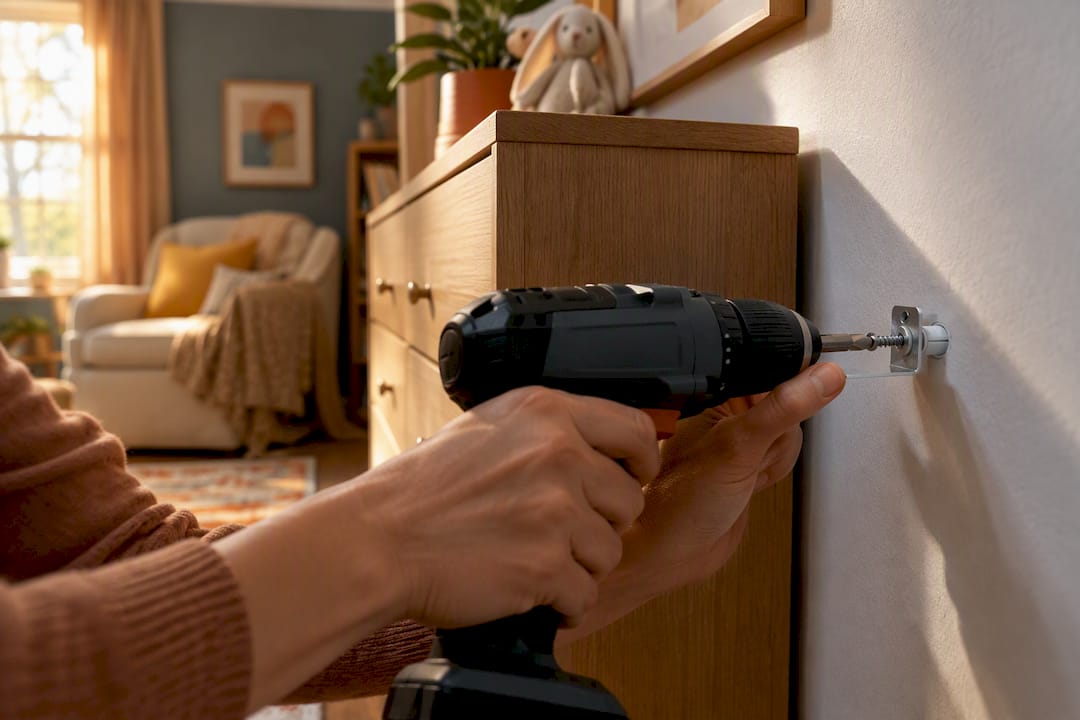
Start early: secure structural hazards during pregnancy, then finish the rest before your baby moves. Anchor heavy furniture and TVs, install hardware-mounted gates at the top of stairs, cover outlets, lock up chemicals and medications, set your water heater to 120°F or lower, and get working smoke and carbon monoxide detectors in place. These six tasks come straight from CPSC guidance and cover the hazards most likely to cause serious injury. Everything else on your babyproofing checklist builds on this foundation.
TL;DR:
- Anchoring heavy furniture and TVs to wall studs is the most effective way to prevent tip-over injuries, which are a leading cause of serious childhood accidents.
- Major structural babyproofing tasks should be completed during pregnancy, while secondary measures like cabinet locks and corner guards are finished before your baby starts crawling around four to six months.
- Setting the water heater to 120°F and installing safety gates only at the top of stairs with hardware-mounted brackets are critical for preventing burns and falls.
- Reassessing hazards at each developmental milestone, such as crawling or pulling up, ensures new dangers are addressed promptly and thoroughly.
- Using a dedicated planner to track installation dates, maintenance, and recalls helps maintain effective home safety over time and prevents forgetting key tasks.
Table of Contents
- Your Quick Babyproofing Checklist Summary
- Room-by-Room Babyproofing Checklist
- When to Start Babyproofing and What Triggers a Recheck
- Key Hazards and the Exact Fixes That Work
- Keeping Your Babyproofing Effective Over Time
- How a Planner Keeps Your Safety Checklist on Track
- What New Parents Get Wrong About Babyproofing
- Get Your Babyproofing Tasks Organized Before Baby Arrives
- Where to Verify These Guidelines
- Sources
- FAQ
Your Quick Babyproofing Checklist Summary
Think of this as your master babyproofing list, the one you print and stick on the fridge. It’s split by timing, because tackling everything the week before your due date is a recipe for burnout.
Do these during pregnancy (structural work)
- Anchor bookshelves, dressers, and TVs to the wall studs.
- Install tamper-resistant outlets or purchase outlet covers for every accessible plug.
- Set the water heater thermostat to 120°F or lower.
- Install smoke and carbon monoxide detectors on every level and test them.
- Install hardware-mounted gates at the top of any stairs.
- Replace corded blinds with cordless window coverings.
- Post the Poison Control number, 1-800-222-1222, somewhere visible in the kitchen.
Finish these before your baby starts moving (usually by 4 to 6 months)
- Lock every low cabinet that holds cleaning supplies, medications, or small objects.
- Add corner guards to sharp furniture edges at crawling height.
- Move houseplants, cords, and small decor items out of reach.
- Install a stove knob cover and a fireplace or hearth gate.
- Add a toilet lock and a non-slip bathmat.
- Check that crib bedding meets safe-sleep guidelines (nothing loose, nothing soft).
Structural fixes take longer to schedule, since some require a contractor or handyman, so pregnancy is the practical window. The second wave is faster but easy to forget once you’re deep in newborn sleep deprivation. Children’s Hospital Colorado recommends exactly this two-phase approach: major structural hazards addressed early, secondary measures completed as your baby approaches mobility.
Pro Tip: Keep a running list on your phone every time you notice a hazard during the newborn haze. You’ll forget half of them by morning otherwise, and by month four you won’t remember why the baby gate is still in the garage.
Room-by-Room Babyproofing Checklist
A whole-home approach is only useful once you translate it into what actually happens in each room. Here’s your babyproofing house checklist broken down by space, with the details that matter most in each.
Nursery
The nursery feels like the safest room in the house, but it’s also where sleep-related hazards concentrate. Crib placement matters more than most parents realize: keep the crib away from windows, blinds, curtain cords, and any furniture your baby could later use to climb out.
- Follow safe-sleep basics: a firm mattress, a fitted sheet, and nothing else. No pillows, blankets, bumpers, or stuffed animals in the crib.
- Route baby monitor cords well out of reach of the crib rail, or use a battery-powered, cordless monitor instead.
- Secure the dresser and any bookshelf to the wall, even if it looks too heavy to tip. Toddlers climb dresser drawers like stairs.
- Cover or replace any window blind cords with cordless versions.
- Skip the changing table safety strap as your only line of defense. Never step away from a baby on a changing table, strap or no strap.
Living room
This is where most families spend their waking hours together, which means it’s also where the highest concentration of tip-over and outlet hazards tends to live.
- Anchor the TV, whether it sits on a stand or a wall mount bracket built for its exact weight.
- Anchor any bookshelf, media console, or floor lamp your child could pull down.
- Cover every accessible outlet, and use an outlet cover box for power strips and multi-plug areas.
- Move remote controls, batteries, and small decor off low coffee tables.
- Add a gate or hearth guard around fireplaces, especially glass-front gas units that stay hot long after the flame goes out.
- Pad sharp coffee table corners.
Kitchen
The kitchen holds more hidden hazards per square foot than almost any other room: knives, cleaning chemicals, hot surfaces, and small appliance cords all in one place.
- Install childproof locks on every low cabinet, especially anything storing cleaning products.
- Add stove knob covers and consider a stove guard if your range sits low enough for a toddler to reach.
- Store knives, scissors, and other sharp tools in a high drawer or locked cabinet, never a low one “just for now.”
- Push small appliance cords (toasters, coffee makers) back so they don’t dangle over counter edges.
- Secure the trash can with a locking lid or store it inside a locked cabinet.
- Keep a baby gate or playpen ready if you cook while your baby is awake and mobile.
Bathroom
Bathrooms combine two of the most serious risks in the house: scald burns and poisoning. Both are entirely preventable with a few concrete fixes.
- Confirm your water heater is set to 120°F or lower. This single adjustment prevents severe scald burns, according to CPSC guidance.
- Test bath water with your wrist or a thermometer. Aim for around 100°F, comfortably warm but nowhere near hot.
- Install a soft spout cover to prevent head bumps in the tub.
- Use a non-slip mat inside the tub and a bath mat outside it.
- Lock cabinets holding medications, cosmetics, and cleaning products, and store anything dangerous up high regardless.
- Add a toilet lock once your baby starts pulling up to standing.
Stairs
Stairs demand the most careful hardware choice on this entire list. CPSC guidance draws a firm line here: only hardware-mounted gates, screwed into the wall studs, belong at the top of stairs. Pressure-mounted gates can fail if a child leans or pushes against them, which turns a safety device into the exact hazard it was meant to prevent.
- Install a hardware-mounted gate at the top of every staircase.
- A pressure-mounted gate is acceptable at the bottom of stairs or in doorways where a fall risk isn’t directly below it.
- Check gate hardware for looseness every few months, since stair traffic loosens screws faster than you’d expect.
- Teach older siblings to close the gate completely, not just push it shut.
Laundry room and garage
These spaces get overlooked because babies rarely spend time there unsupervised, but that’s exactly why hazards accumulate unchecked.
- Lock cabinets or high shelves holding laundry detergent pods, which look like candy to toddlers and are genuinely dangerous if swallowed.
- Store tools, paint, and automotive fluids on high shelves or in a locked cabinet.
- Keep lawn and garden chemicals, including fertilizer and pesticides, out of reach entirely.
- Unplug and store extension cords and power tools rather than leaving them coiled on the floor.
Outdoors and pool areas
Outdoor spaces need layered protection, not a single fix. Poolsafely recommends stacking multiple barriers rather than relying on any one device alone.
- Install a four-sided isolation fence around any pool or spa, separate from the yard fence.
- Use self-closing, self-latching gates on every pool fence entry point.
- Add a pool alarm as an additional layer, never a replacement for fencing or supervision.
- Reestablish every barrier immediately after pool use. A gate propped open for ten minutes is enough time for a tragedy.
- Check the yard for standing water in buckets, kiddie pools, or drainage areas, since infants can drown in just a few inches.
- Inspect play structures for pinch points, sharp edges, and secure anchoring to the ground.
When to Start Babyproofing and What Triggers a Recheck
Timing your babyproofing checklist around your pregnancy and your baby’s development saves you money, stress, and repeated trips to the hardware store.
Phase one, during pregnancy, should focus on the big structural jobs: anchoring furniture, fixing outlets, adjusting the water heater, and installing detectors and stair gates. These tasks often require tools, a ladder, or a contractor, and they’re far easier to schedule while you still have full mobility and energy. Children’s Hospital Colorado frames this as the priority window for exactly that reason.
Phase two, typically between 4 and 10 months, covers the secondary measures: cabinet locks, corner guards, additional gates, and clearing small objects from low surfaces. Your baby doesn’t need these on day one, but the window to finish them closes faster than most parents expect.
Watch for these developmental triggers, since each one opens up a new set of reachable hazards:
- Rolling over means your baby can now move off a changing table or bed in a single motion.
- Crawling puts every low cabinet, cord, and dropped object within reach.
- Pulling up to stand brings tablecloths, cords, and unstable furniture into play.
- Cruising along furniture means anything wobbly, unanchored, or top-heavy becomes a tip-over risk.
Reassess your whole-home safety every time your baby hits one of these milestones, not just once at the start.
Key Hazards and the Exact Fixes That Work
Some hazards deserve more precision than a general checklist bullet can offer. Here’s what the numbers actually say and what to do about each one.
Outlets and cords. Tamper-resistant receptacles are the sturdier long-term fix compared to slip-on outlet plugs, since Consumer Reports testing has found that determined toddlers can often pry plugs loose. If you’re not replacing outlets, use sliding-plate covers and outlet cover boxes for power strips and multi-plug clusters.
Tip-overs. Furniture and TV tip-overs cause thousands of childhood injuries every year, and the fix is straightforward: anchor with two anchor points driven into wall studs, not drywall alone, according to CPSC’s tip-over prevention data. Mounting a TV directly to a dresser top instead of a wall bracket is especially risky, since the dresser itself can tip under the combined weight.
Windows and cords. Corded blinds are one of the more underestimated hazards in an otherwise babyproofed home. CPSC’s cordless guidance recommends replacing corded window coverings outright rather than relying on tension retrofit kits, which are a temporary fix at best.
Water and scald prevention. Set your water heater to 120°F or lower, and keep bath water around 100°F. A soft spout cover and an anti-scald tub valve add extra protection where a toddler might turn the hot tap on their own.
Poison prevention. Lock every cabinet holding cleaning products, medications, or supplements, and store them up high as a second layer of defense. Post 1-800-222-1222, the Poison Control number, somewhere visible in your kitchen. If ingestion happens, call Poison Control immediately rather than searching online for answers.
Gates. Pressure-mounted gates work fine for doorways and low-stakes locations, but CPSC gate guidance is clear that only hardware-mounted gates belong at the top of a staircase.
Pro Tip: Test every anchor and gate by pulling on it with real force, the way a determined toddler would. If it wiggles under your hand, it will fail under theirs.
No device on this list makes your home entirely childproof. The CPSC itself states plainly that these products are a layer of protection, not a substitute for supervision.

Keeping Your Babyproofing Effective Over Time
Babyproofing isn’t a one-time project you finish and forget. Hardware loosens, batteries die, and your baby’s reach grows every month, so a maintenance routine matters as much as the initial setup.
- Test smoke and carbon monoxide detectors monthly. Replace batteries as needed, or install sealed 10-year units so you’re not chasing beeping alarms at 2 a.m.
- Recheck furniture and gate anchors annually, and always after a move, since new walls may have different stud spacing or drywall type.
- Search SaferProducts.gov and the CPSC recall list for every crib, car seat, high chair, and gate you own, and sign up for recall alerts so you catch future ones automatically.
- Inspect toys regularly for loose small parts, cracked battery compartments, and worn stitching that could release stuffing or beads.
- Retest bath and tap water temperature every few months, since some water heaters drift upward over time even after you’ve set them.
A quick monthly walkthrough, room by room, catches most of what slips through the cracks. It takes fifteen minutes and it’s the cheapest insurance you’ll ever buy.
How a Planner Keeps Your Safety Checklist on Track
Knowing what to do is one thing. Remembering to do it, and tracking whether you actually finished, is a different problem entirely. That’s the gap a structured planner is built to close.
A planner can include timeline pages organized by pregnancy trimesters that align with the two-phase babyproofing approach: structural fixes during pregnancy and secondary measures before your baby becomes mobile. It provides a convenient place to log installed anchors, detector battery replacements, and contractor contacts, helping you keep track of safety tasks without relying solely on memory.
Because the planner is physical, it stays put on your kitchen counter or nursery shelf, ready whenever you need to check off a task or jot down a reminder. Pair it with the maintenance routine above, and you’ve got a running record of your home’s safety status, not just a checklist you filled out once and lost track of.
What New Parents Get Wrong About Babyproofing
Most new parents assume babyproofing means the small stuff: outlet covers, cabinet locks, corner guards. Those matter, but they’re not what causes serious injuries. The big three, tip-overs, stairs, and water temperature, get underestimated constantly because they’re not the products stocked at the front of the baby aisle.
Anchoring furniture is the task I see skipped most often, usually because it requires a drill, a stud finder, and twenty minutes most exhausted parents don’t feel like spending. It’s also the fix with the highest payoff relative to effort. If you do nothing else on this entire list, anchor the dresser and the TV.

Devices are a layer, not a solution. A locked cabinet buys you seconds, not indefinite safety, and a hardware-mounted gate only works if it’s actually latched. Supervision remains the constant underneath every fix on this page, and no checklist changes that.
One last practical note: don’t try to do this alone in a weekend. Involve a partner, a friend, or a handyman for the anchoring and gate installation. Two sets of hands make stud-finding and drilling faster, and you’re less likely to skip a step when someone else is watching you do it.
— Rebeka
Get Your Babyproofing Tasks Organized Before Baby Arrives
Checklists work best when they don’t live only in your head or scattered across sticky notes on the fridge. The Baby Bare Essentials Physical Planner ($120, one-time purchase) gives you dedicated pages to schedule structural safety fixes during pregnancy, track secondary measures before your baby starts crawling, and log installer contacts and completed tasks in one permanent place.

If you’d rather work digitally, the Digital Edition ($25, one-time purchase) covers the same trimester-by-trimester structure. Either version complements the safety devices and supervision habits in this guide; it doesn’t replace them. Visit Babybareessentials to see which format fits how you like to plan, and start filling in your own babyproofing timeline today.
Where to Verify These Guidelines
- CPSC’s Childproofing Your Home: government guidance on outlets, gates, water heaters, and device limitations.
- Children’s Hospital Colorado’s room-by-room checklist: pediatric guidance organized by room and timing.
- Poison Control: call 1-800-222-1222 for any suspected poisoning or ingestion emergency.
- Consumer Reports babyproofing guide: independent product testing for durability and fit.
- Poolsafely: federal guidance on pool fencing, alarms, and drowning prevention.
Sources
- A room-by-room baby-proofing checklist for parents | Children’s Hospital Colorado
- Childproofing Your Home | U.S. Consumer Product Safety Commission (CPSC)
- Poison Help (HRSA)
- Babyproofing guide and safety checklist | Consumer Reports
- Poolsafely
FAQ
What is the single most important babyproofing task?
Anchoring heavy furniture and TVs to wall studs prevents tip-overs, one of the leading causes of serious childhood injury at home, according to CPSC data. It takes minimal cost and effort compared to the risk it removes.
When should I start babyproofing my home?
Start structural work, like anchoring furniture and installing detectors, during pregnancy, then finish secondary measures such as cabinet locks and corner guards before your baby starts crawling, typically between 4 and 10 months. Children’s Hospital Colorado recommends this two-phase timeline specifically because structural jobs take longer to schedule.
What temperature should my water heater be set to?
Set your water heater to 120°F or lower to prevent scald burns, and keep actual bath water closer to 100°F, according to CPSC guidance. A tub spout cover adds an extra layer of protection against head bumps.
Are pressure-mounted gates safe for the top of stairs?
No. Pressure-mounted gates can fail if a child pushes or leans against them, so CPSC gate safety guidance recommends only hardware-mounted gates, screwed into wall studs, for the top of any staircase. Pressure-mounted gates remain fine for doorways or the bottom of stairs.
How can I track babyproofing tasks without forgetting steps?
A dedicated planner works well for this, since it lets you log which tasks are finished, note installer or contractor contacts, and revisit maintenance items on a set schedule. The Baby Bare Essentials planner organizes these tasks by trimester and developmental stage, so nothing depends on memory alone during an already busy season.
What number should I call if my child swallows something dangerous?
Call Poison Control immediately at 1-800-222-1222 for any suspected poisoning or ingestion emergency. Post the number somewhere visible in your kitchen so it’s within reach before an emergency happens, not searched for during one, per Poison Control’s own guidance.
Leave a Reply